
Having a custom domain name will help you create your own identity on the internet. Whether you are blogging personally or for business, having a top-level root domain name will establish your authority over those sub-domain sites that rely on Blogger, WordPress, and other publishing platforms.
If you are serious about establishing your authority and identity, having a customized email address using your domain will let users and customers know that you mean serious business. Receiving an email from [email protected] has a higher chance of yielding expected results than the same content being sent by [email protected].
Often, domain name registrars offer email services, but the functionalities that are being offered are either too basic or too costly for average users. Also, on people’s usual course of work, switching between email addresses for personal, business, and custom domain emails can be too much.
What if we tell you that there is a way to use Gmail to send and receive custom domain emails? What if we tell you that the feature is free and that all the things that you need to know will be outlined in the next paragraphs? What you just need to do is to read through the whole article.
Set up Gmail to Send and Receive Custom Domain Emails
To start sending and receiving emails for your domain using Google, do these:
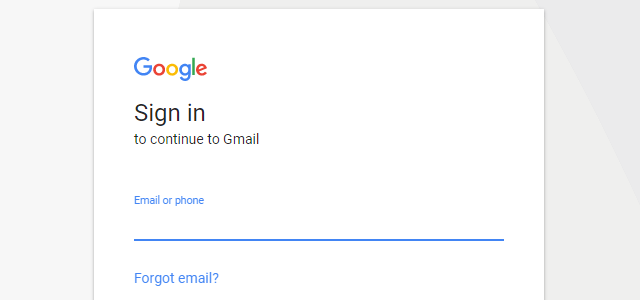
1. Sign in to your Gmail account. If you have not one yet, you can create a free Google account and avail of Google’s services including Gmail.
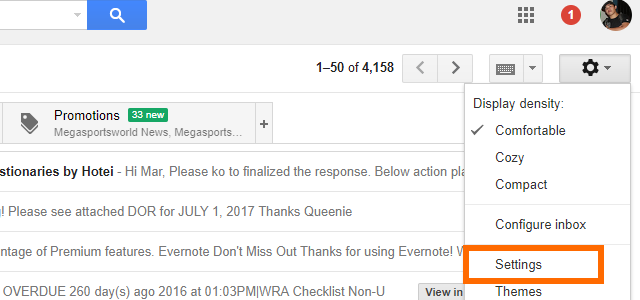
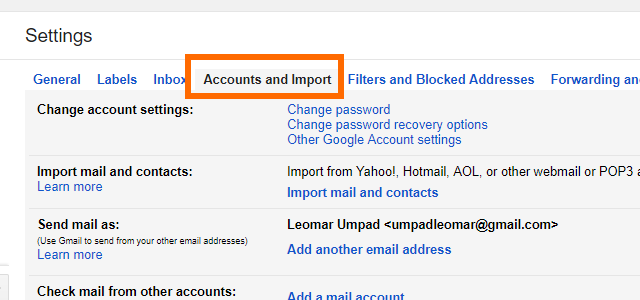
2. Open Gmail’s Settings menu by clicking on the gear icon located in the upper-right part of your screen.
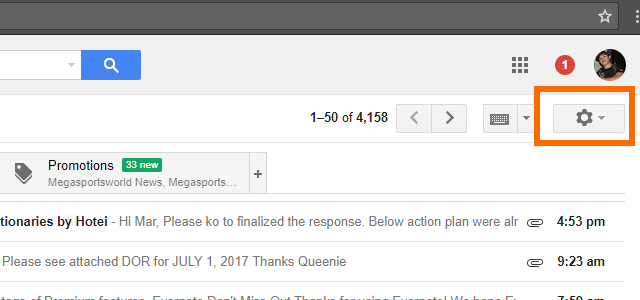
3. Click on the Settings option to go to Gmail’s settings.
4. From Settings, click on the Accounts and Import tab.
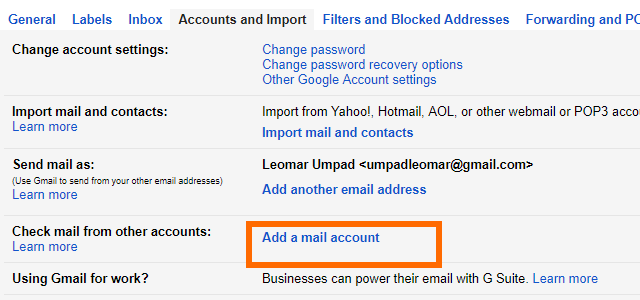
5. Click on the Add a mail account option.
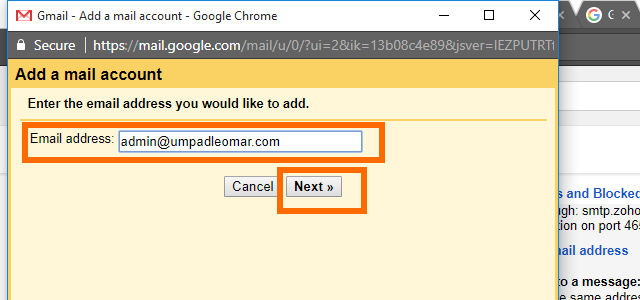
6. A pop-up box will be displayed. Enter your custom domain email address. Click on the Next button to proceed.
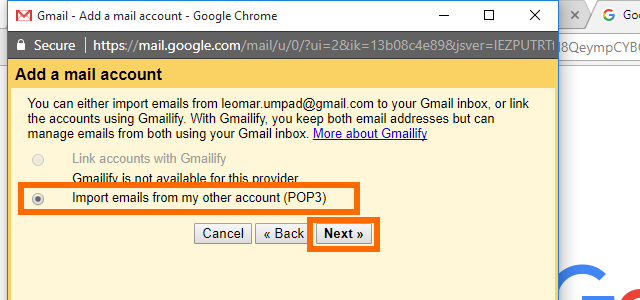
7. Click on the tick box for Import emails from my other account (POP3). Click on the Next button to proceed.
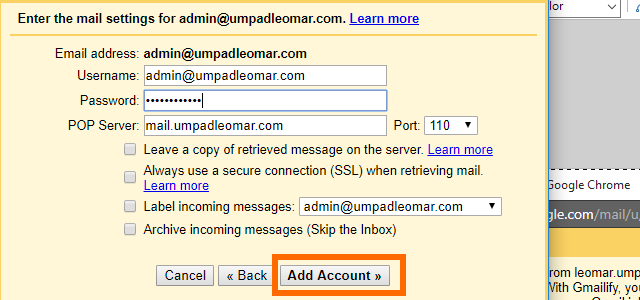
8. Fill up the next page with the details for your custom domain email. The critical data required are the following: username, password, POP server, and port. Click on the Add Account button to proceed. Wait for Google to process the request.
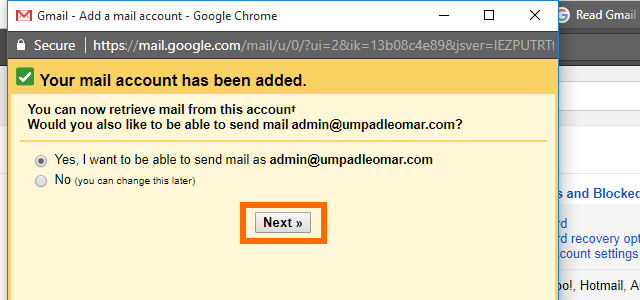
9. You just added your email account. Click on the tick box that says Yes, I want to be able to send mail as [email protected]. Click on the Next button to proceed.
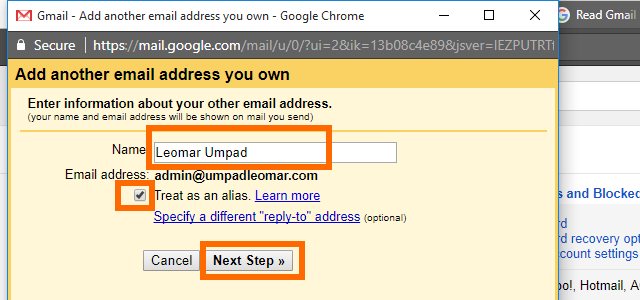
10. Enter information about your custom domain email address. Enter your name, click on the tick box that says Treat as an alias. Click on the Next button to proceed.
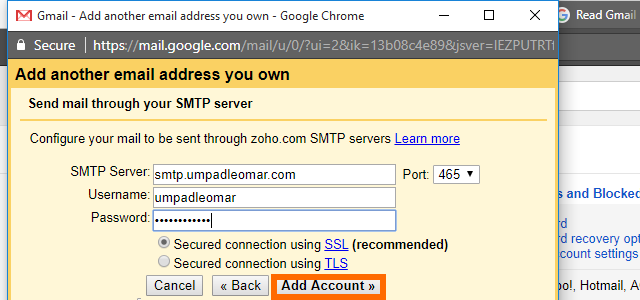
11. Enter your custom domain’s SMTP server. Required details are the following: SMTP Server, username, and password. Choose between types of secured connection before clicking on the Add Account button.
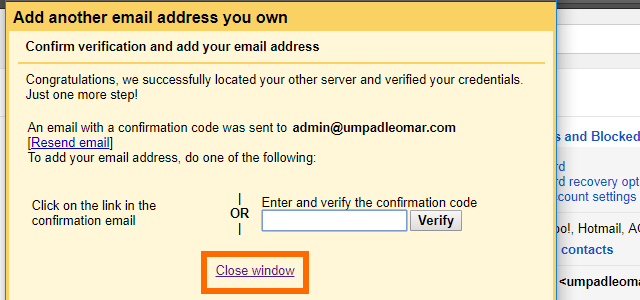
12. You are almost done. You just need to confirm that you are the owner of the custom domain email address by clicking on a link sent to that email address or by entering the verification code in the appropriate text box. If you chose the latter, click on the Verify button once you put in the code in the text box. Click on Close window button if you verified by clicking on the link in your email.
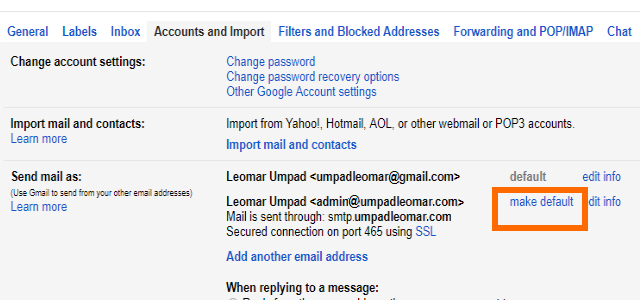
13. You will be back on the Accounts and Import tab. The newly added custom email address will be displayed as one of your email addresses in the Send Email As option. Click on the Make Default option to use Gmail to send and receive custom domain emails.
14. You are done. Create a new email using your Gmail account
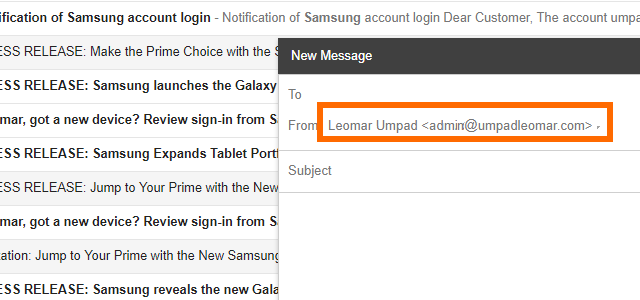
You have just learned how to create Gmail to send and receive custom domain emails. All emails using your Gmail account will now appear to be coming from your domain email. All incoming emails, intended for the same domain email, are forwarded to your Gmail account.
Let us know if you have some questions and don’t forget to share this article to help friends who may need to learn about this.