

By default, Blogger sites use the generic blogspot.com domain. Fortunately, we have a tutorial on how to use a customized domain name on Blogger for free.
What is Blogger?
Blogger is owned by Google and is a venue where bloggers and starting website owners and developers go to start a free website and hosting service. However, all Blogger sites use the generic top level domain name, blogspot.com. Having the name blogspot.com on your website may not be that bad when you are just starting your site. However, when you are trying to build a name and authority on the web, you need to get your custom domain name. The good news is that Google allows users to use a custom domain name on Blogger for free. The better news is that this article will guide you how to set one up. Continue reading to learn how you can easily use a custom domain name on Blogger.
How to Use a Custom Domain Name on Blogger
You can set a custom domain name on Blogger for free by following these steps:
1. Go to Blogger.com and click on the Sign In button.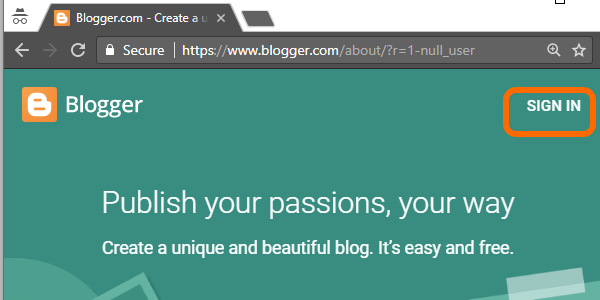
2. Sign into Blogger using your Google account. 
3. You will be taken to the last blog that you accessed. Click on the Blog Selector button on the upper right part of the page to view all the blogs for your account.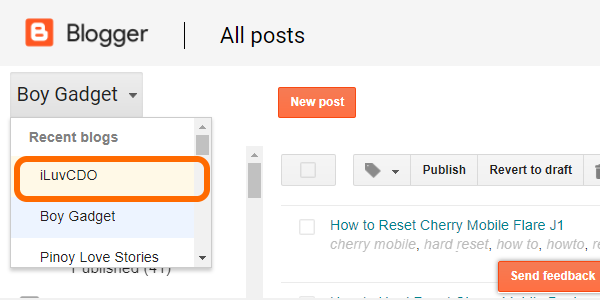
4. Click on the blog name that you want to set with a custom domain. 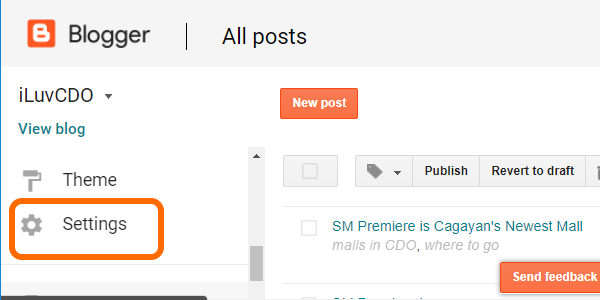
5. Scroll down and click the blog’s Settings.
6. From Settings, click on the Basic options.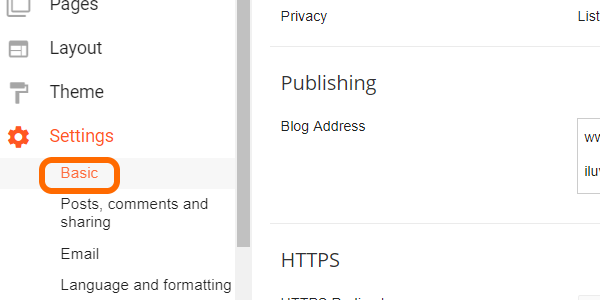
7. Under Publishing, click the Setup a 3rd party URL for your blog option.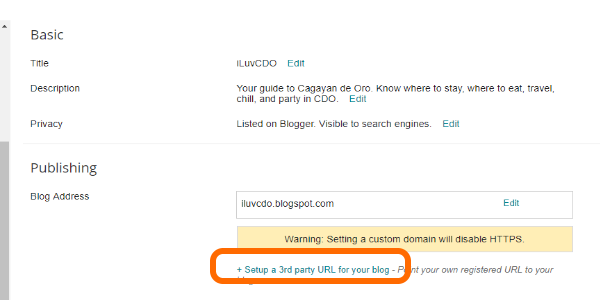
8. Below the Third party domain settings, enter a custom domain name that you own. Click Save.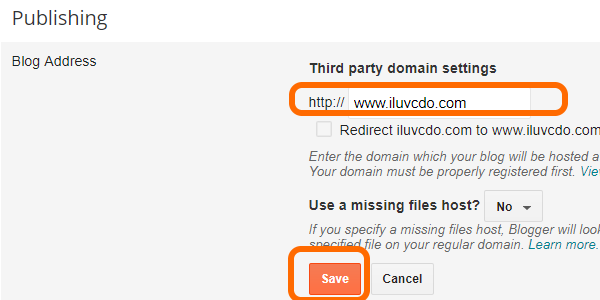
9. Take note of the two CNAMEs given by Blogger. You will need to enter the CNAMEs in your domain registrar’s DNS settings to establish your ownership of the domain.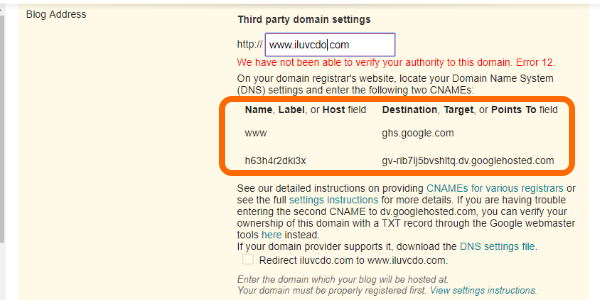
10. Log into your domain registrar account. We will be using GoDaddy for this example.
11. Go to your Domain Manager. Since we are using Godaddy for our example, click on your username and then open the Manage Domain option.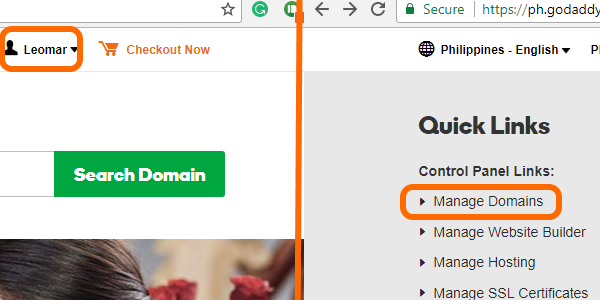
12. Open on the menu for the domain by clicking on the three dots in the Manage column then click on Manage DNS.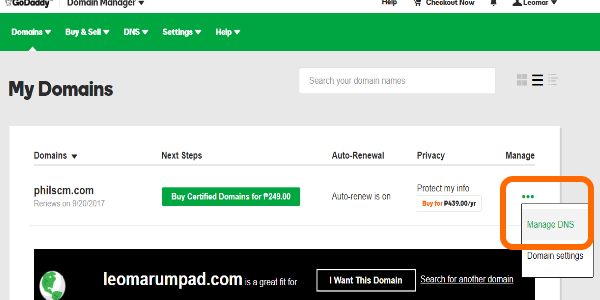
13. Click on the Edit button for one of the CNAMEs.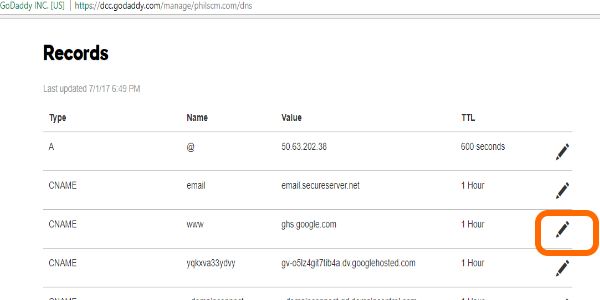
14. Enter one of the CNAME details provided by Blogger in Step 9. Click Save to save changes. Repeat the same procedure for the second CNAME.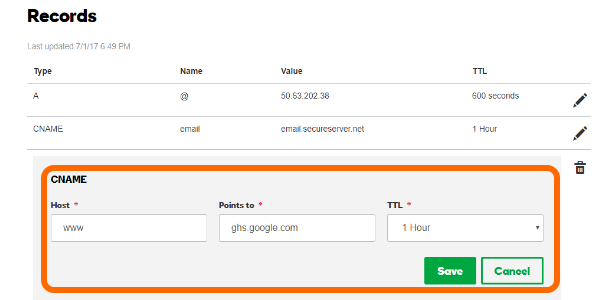
15. Go back to Blogger and re-enter the customized domain name then click on Save.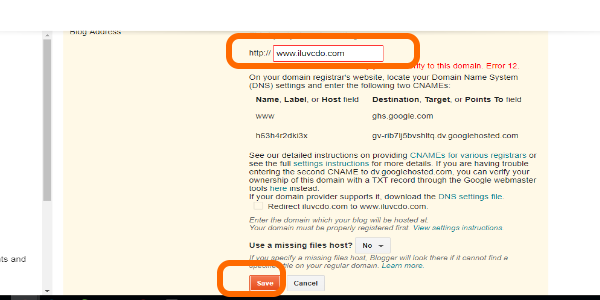
16. You are done. Check if the setting up of a customized domain name on Blogger is a success by entering the customized domain in any browser’s search tab. The browser should display your Blogger site using the customized domain from GoDaddy.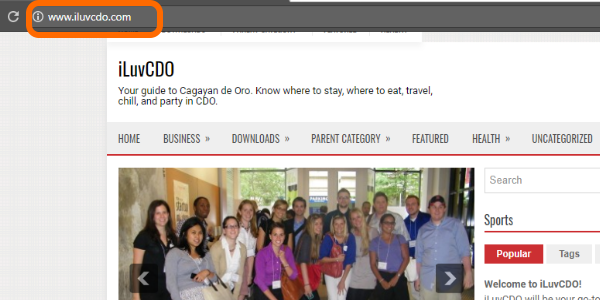
Setting up a custom domain name on Blogger may be a bit completed that is why we made a step-by-step tutorial complete with images to help you use that custom domain on Blogger. If you are stuck in a step or have some questions regarding the tutorial, please leave a message in the comments section.